During the initialisation you authenticate yourself to the bank server of the financial institution, select a TAN procedure and download order types.
|
1. |
On the start page, in the area No TAN procedure is selected for the bank access "<name of bank access>"., click on the Select now button.
|
||||||||
|
2. |
On the confirmation mask, click on Continue. |
||||||||
|
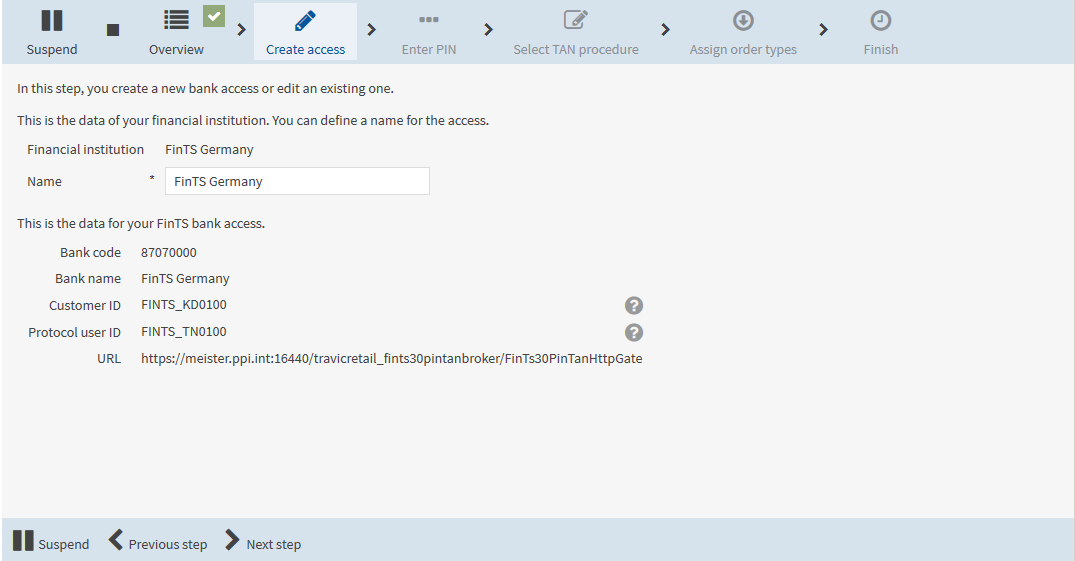
3. |
In the field Name, enter the name of the bank access. |
||||||||
|
4. |
Click on Next step.
|
||||||||
|
|

|
||||||||
|
5. |
Read the information on the mask. Enter your PIN to authenticate yourself at your financial institution. Optionally, you can save the PIN permanently. If you do not save the PIN permanently, it will be saved for the duration of the session. You must then enter the PIN again upon your next login. Note: You received the PIN of the bank access from your financial institution. Click on Next step. |
||||||||
|
|
|
||||||||
|
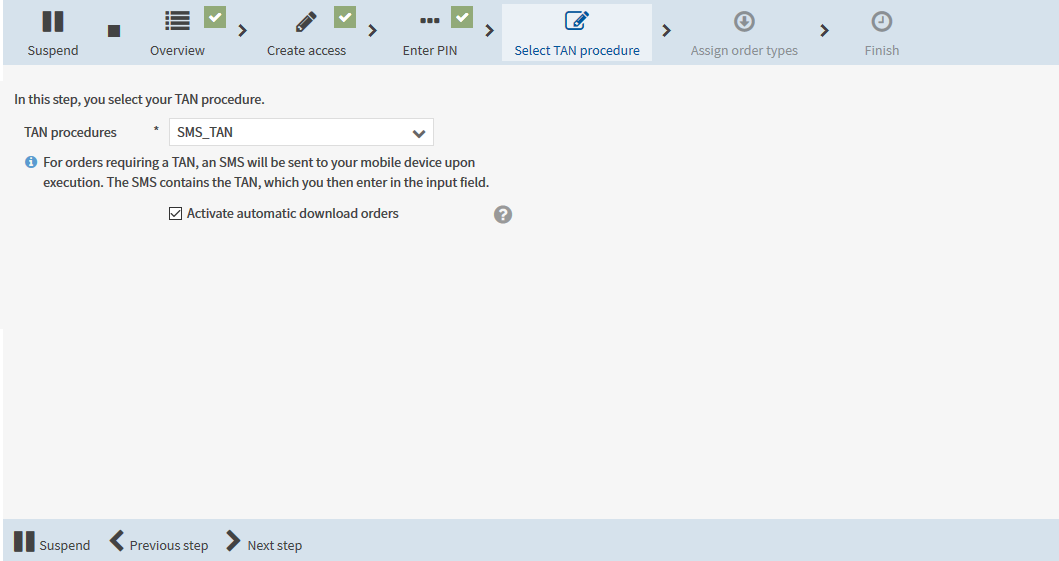
6. |
From the selection list TAN procedure, select the TAN procedure and the corresponding TAN medium which you wish to use to authorise your business transactions. Which TAN procedures and respective TAN media are available for selection depends on your financial institution. The bank server may require you to perform a release via the entry of a TAN.
|
||||||||
|
7. |
To execute automatic download orders for this bank access in the menu File manager, activate the checkbox Activate automatic download orders. Please note that costs can arise from TAN requests via a mobile device. |
||||||||
|
|
|||||||||
|
8. |
Click on Next step. To download the order types assigned to you (i.e. your protocol user) at the bank server, click on Download order types.
|
||||||||
|
|
|||||||||
|
9. |
Click on Next step. Your bank access has been initialised successfully. You can use this bank access to execute order types that are assigned to you at the bank server, for example releasing payment orders and transferring them to the financial institution. |
||||||||
|
10. |
Click on Quit wizard. |
||||||||


|
To change your bank access later, select , tab Bank accesses. |